EE3305 Experiment 1: PID Control
Useful Materials: https://rsl.ethz.ch/education-students/lectures/ros.html
Problem Statement
In this lab, you are required to perform a simulation in the following situation:
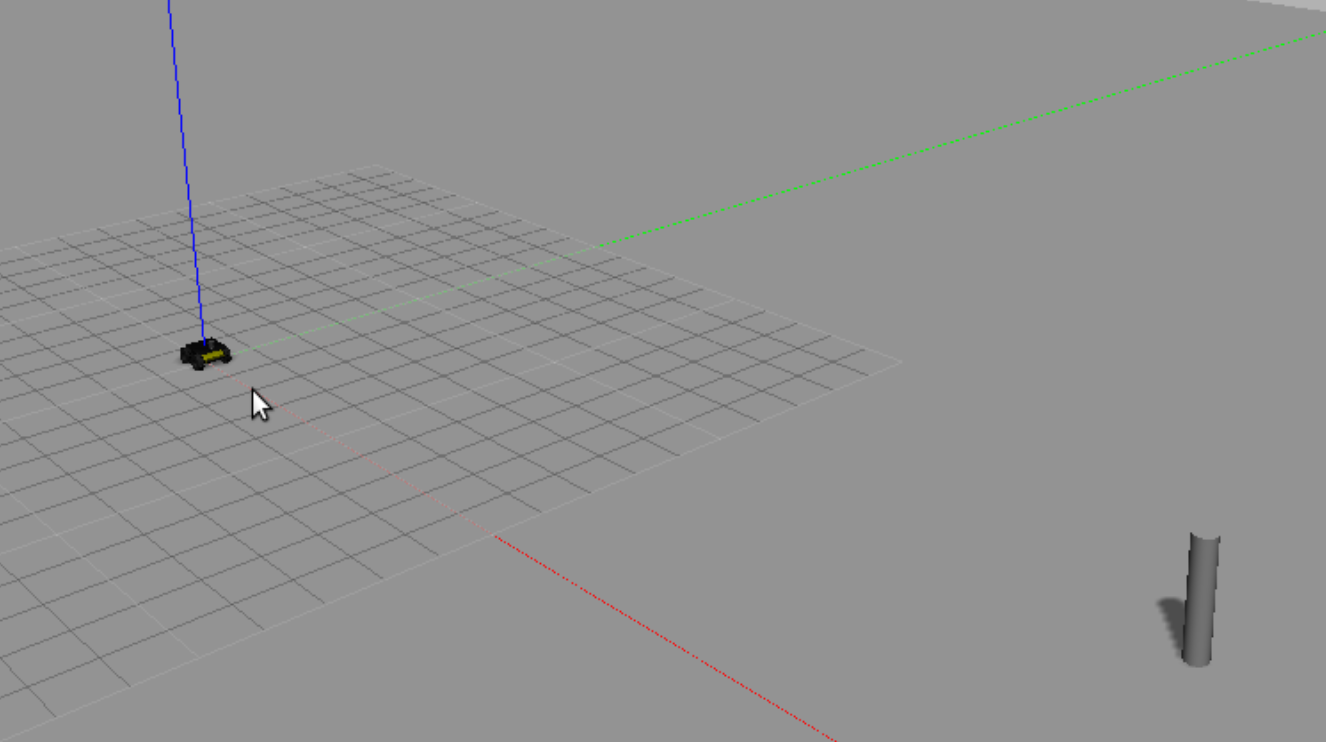
- A robot is put at the original position (0, 0).
- A target (a pillar) is put at the target position (X, Y).
- Implement a PID Controller to make the robot reach the target with a certain distance. The PID Controller subscribes the laser scan data to evaluate the position error, and publishes the next velocity parameter.
Environment Required
Install ROS: follow the WiKi steps
Install catkin: follow the WiKi steps
Install husky simulator:
http://wiki.ros.org/husky_gazebo/Tutorials/Simulating%20Husky
sudo apt-get install ros-<distro>-husky-simulatorchange theto your ROS version. The package will be installed under the default dir of ROS.
Check whether you can find the package husky_gazebo:
rospack list | grep huskyTry to launch the husky using one of the example launch file:
roslaunch husky_gazebo husky_empty_world.launchCheck the nodes currently running. Check the topics and msgs currently published. Using cmd
rostopic list,rostopic info [topic_name],rostopic echo [topic_name],rosmsg info [msgs_name]The laser scan data input is provided with
/scantopic. To control the robot, publish on the/husky_velocity_controller/cmd_velto configure the velocity.Check the msgs definition, and the topics content.
*[Q1]** Please find out the angle range (in degree), angle scan increment of the laser scan data. How can you find the distance and orientation of the pillar (under the coordinate system of the robot)?
Task Goal
Step 1: Familiar with ROS operation:
1.1. create a catkin package
- Create a source file folder
~/ROSLearning - cmd
catkin create pkg pid_control - A folder
pid_controlwill be generated, with two filesCMakeLists.txtandpackage.xml - Create a soft link in
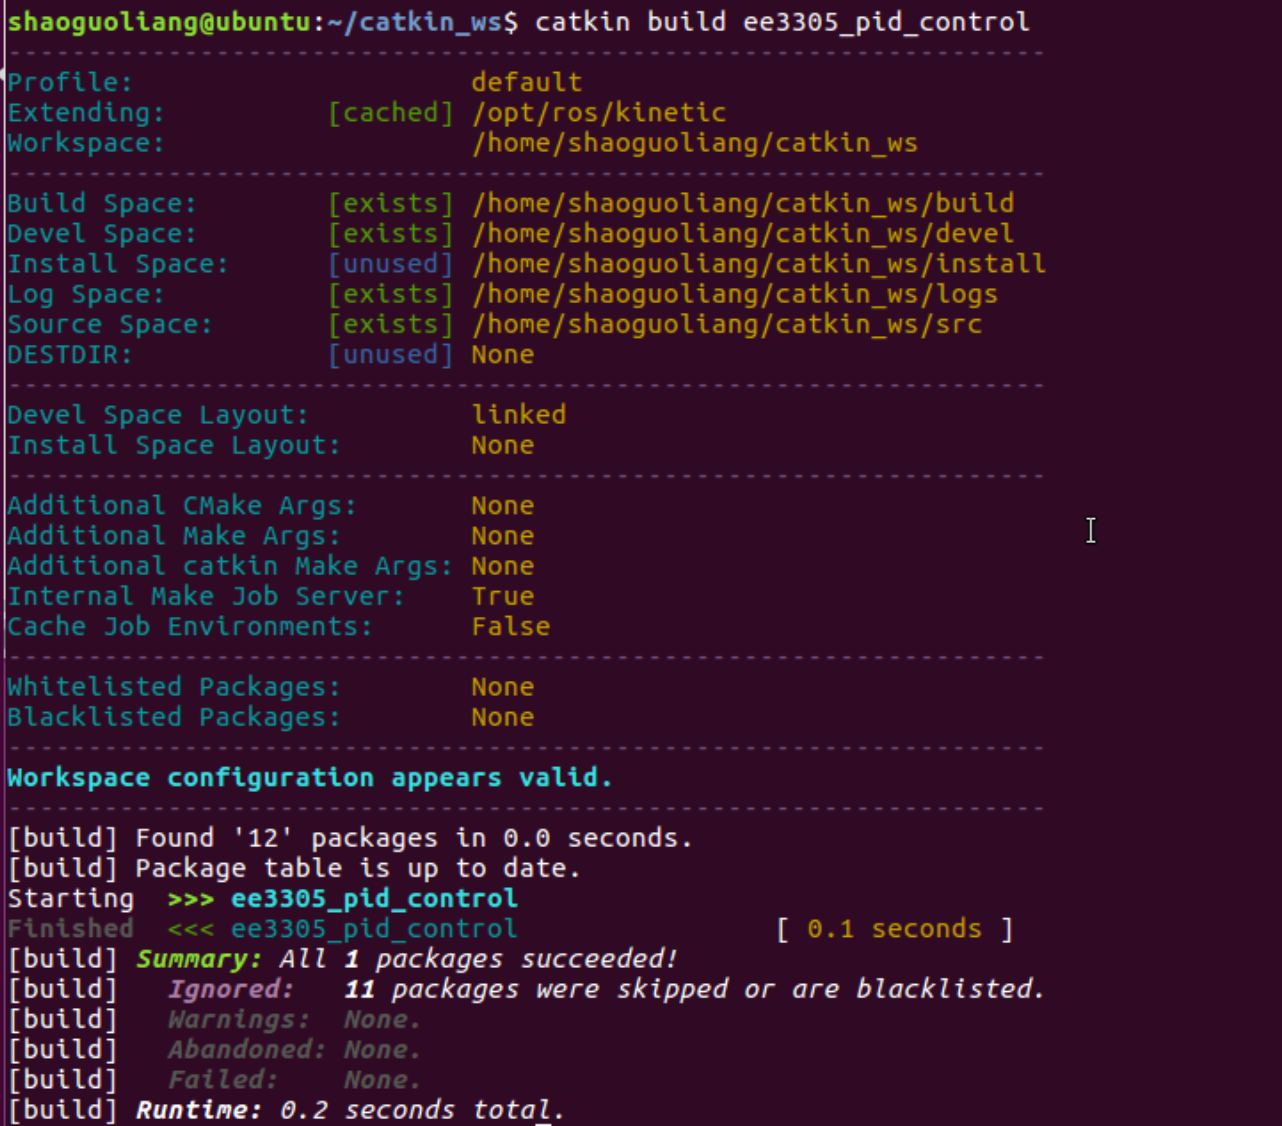
~/catkin_ws/srcusing cmdln -s [source_dir]. So that you don’t change anything in catkin_ws project, rather you write your code in your source folder. - You can build your package using cmd
catkin build [package_name]. It is suggested to use build command rather than make command. You can also use cmdcatkin cleanto remove the previously generated file from thecatkin_ws/src. After using thecatkin buildcommand, the project folder is like:
1 | |-- catkin_ws |
1.2. know the CMakeLists.txt
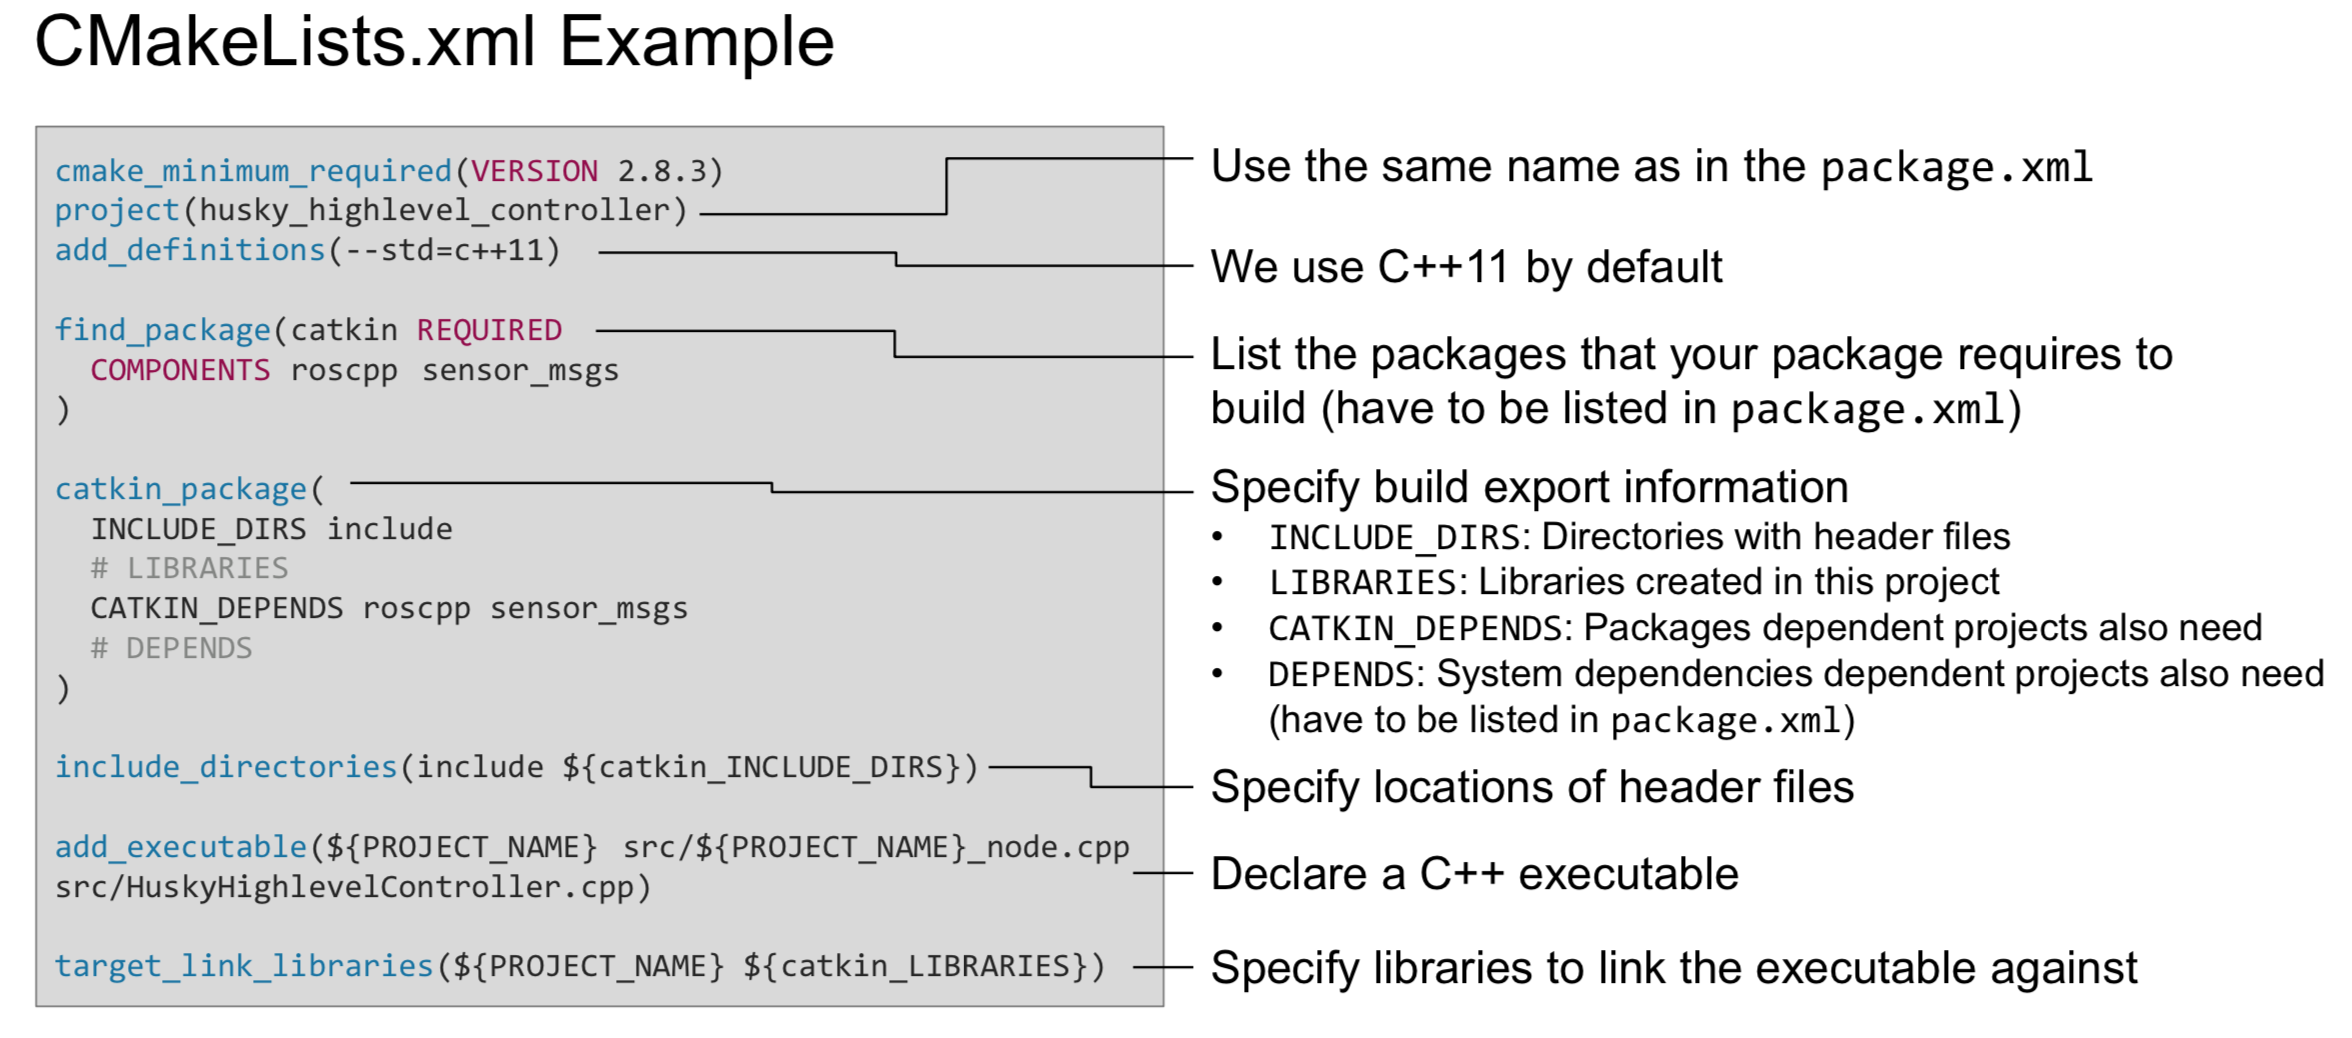
From https://rsl.ethz.ch/education-students/lectures/ros.html
The CMakelists.txt controls the build process of your source code. So you need to make changes as you add source file into your project. The first goal is to generate the world and the robot you want to control. This can be done by adding the related module in the launch file.
1.3. know the package.xml
The package.xml defines the properties of the package, especially the dependencies required to performing your node.
You can find all the built-in ros package using the cmd rospack list. Do remind that if the rospack list does not find the package you created, it is because you haven’t include the path to $ROS_PACKAGE_PATH. You can check the path using cmd echo $ROS_PACKAGE_PATH, if you can’t find the directory in your catkin_ws/src, you need to update the setup through:
1 | catkin_ws/devel $ source setup.bash |
1.4. generate a world and a robot
Launch file is a tool to start multiple nodes as well as setting parameters. A launch file is written in xml as *.launch.
Create a launch folder in you source directory, and create a launch file pid_control.launch as follows.
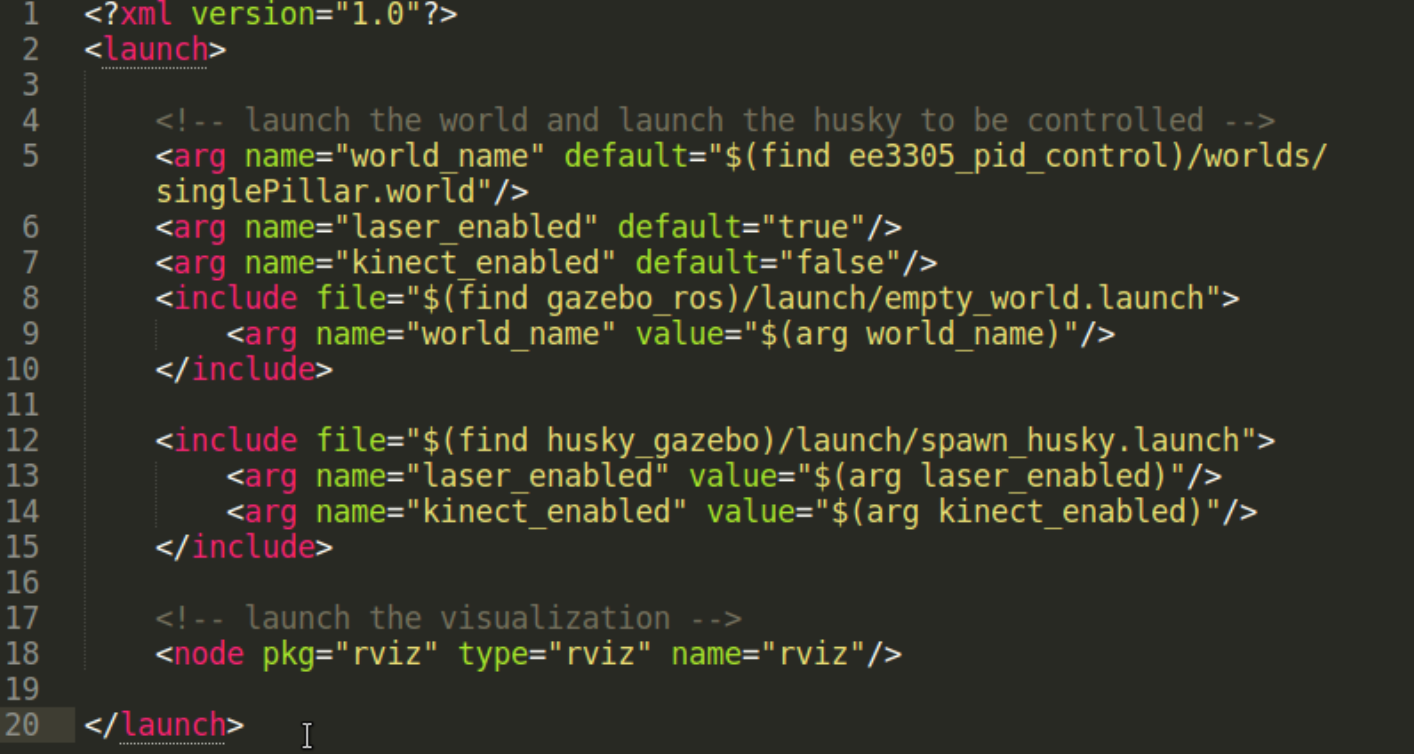
So the above launch file, we include a world with directory $(find ee3305_pid_control)/worlds/singlePillar.world. $(find ee3305_pid_control) is shell cmd same as rospack find ee3305_pid_control. Create a worlds folder in your src directory and import the world file provided. A robot model is also included with directory $(find husky_gazebo) check this package by yourself. In the end we add a node to visualise the world and the robot.
First, start the roscore to manage all the system. cmd roscore, and leave it in an independent window.
Launch all the nodes using cmd roslaunch [pkg_name] [launch_file_name] or find the launch file directory cmd roslaunch [launch_file_name].
1.5. check the topics published
- Use
rostopic listto view all the topics - Use
rostopic echo [topic_name]to view the msgs in the topic - Use
rostopic type [topic_name]to view the type of msgs of the topic - Use
rostopic show [topic_name]to view how the msgs are define (the structure of the msgs)
Check the topic on /scan and /husky_velocity_controller/odom.
Step 2: Create your node with pid control
Before you create your algorithm node, your project file should be like this:
1 | |--pid_control |
2.1 Create your node
Create the
srcfolder (store your processing code) and theincludefolder (store your header code)Creating your code as provided
Modify the CMakeLists.txt and package.xml
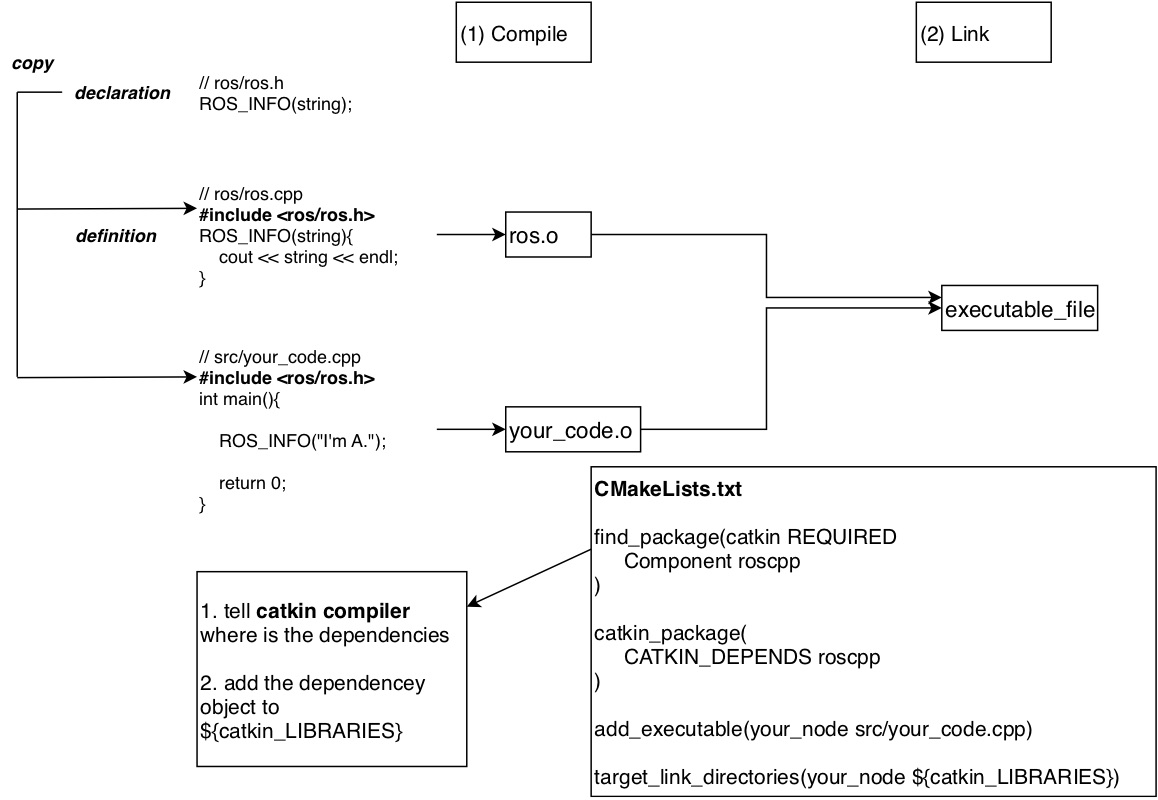
The compile procedure:
1
2
3
4
5
6
7CMakeLists.txt
-- find_package : tell catkin to find the required packages,
-- catkin_package : add include_dirs, libraries, catkin_depends, depends
-- add_executable : tell catkin the file you want to create the executable object
-- target_link_libraries : link the relevant object file
package.xml : indicate the dependencies your package required.Modify the launch file
Add<node>tag<node pkg="pkg_name" type="executable_name" name="node_name" output="screen">
pkg_name: The name when you use catkin create pkg
executable_name: The name in CMakeLists.txt add_executable
node_name: The name when you initialize a node using ros::init(“node_name”)roslaunchyour launch file, and check the node has been launched. Userqt_graphto check the topics that connects all the nodes.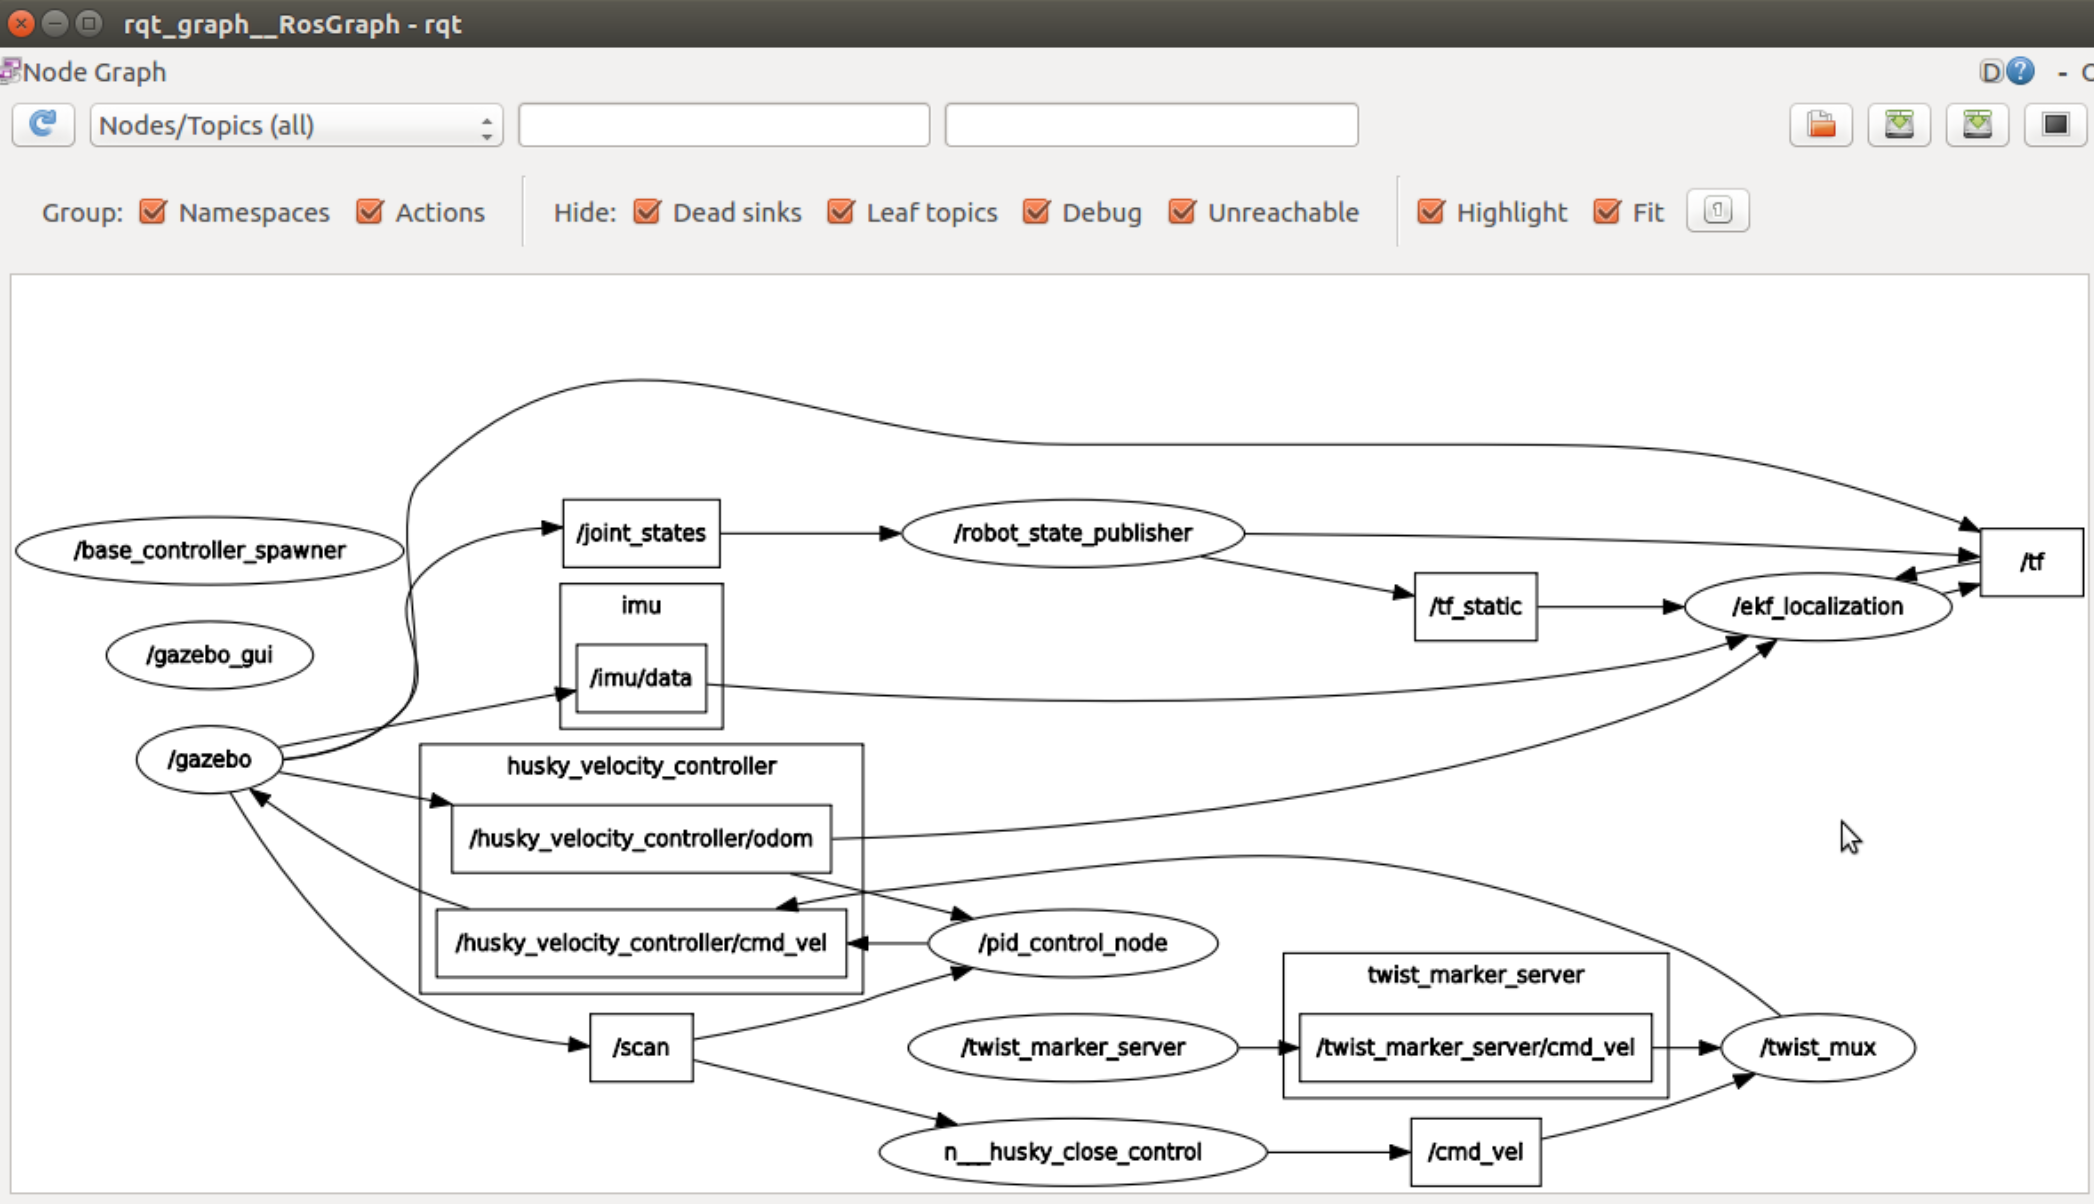
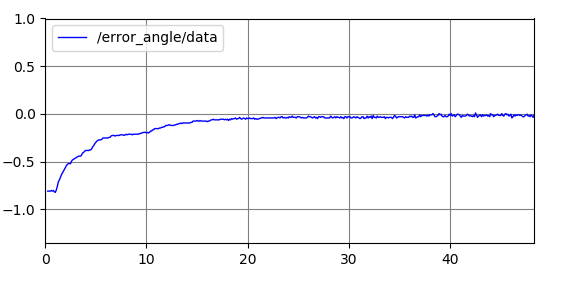
Use
rqt_plotto show the error in a new terminal window.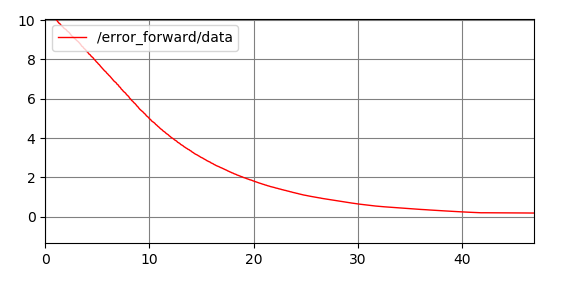
Change the gain of PID control in config.yaml, and check the difference.
- Why do you need a config file? In PID control, you have some parameters to tune to achieve a good performance. Traditionally, the parameters are defined in the code, then once you change the parameter, you have to compile and build again. However, if you use a config file, your algorithm will first load the parameters from the config file when initializing the node rather than compile the code again.
- config.yaml is just a text file, using
name: valuepair to indicate the parameters. - In your code, use the following example:
1 | if(!nodehandle_.getParam("/Kp_f", Kp_f)){ |